Are you ready to be creative and craft a masterpiece of your own? With a little patience and some know-how, you can easily create a stunning mosaic art piece you can be proud of.
Learn the basics of making mosaic art by following this guide. It covers everything from material selection to designing and creating the mosaic, applying mortar, and finishing the artwork.
Discover the beauty of mosaic art and unleash your inner artist!
Key Takeaways
- Select various materials and objects for the tesserae, considering their colour, shape, and alignment with the theme.
- Choose a suitable and sturdy base for the mosaic, avoiding bases with many notches.
- Clean the base thoroughly before adhering to the mosaic tiles, using appropriate cleaning methods for different materials.
- Design and create the mosaic by transferring a pattern onto the base, cutting the tesserae into desired shapes and sizes, and adjusting or replacing pieces as needed.


What You Need to Get Started

You’ll need to choose the right materials, select a suitable base, and design a pattern to get started on your mosaic art project. You’ll need to explore the different types of tesserae available, from glass, stones, porcelain, and seashells to buttons, bones, and metals. You can create a visually stunning mosaic with various colours and shades. Save time using precut pieces and choosing colours based on your project’s theme.
When you’ve selected your materials, it’s time to find a suitable base. Consider using wood, terracotta, or glass as a foundation. Metal bases may require sanding and a wire brush to remove rust. Clean the base and score plastic or rubber surfaces with a utility knife to ensure proper adherence. Wood surfaces should be sanded and waterproofed.
Now, it’s time to find your inspiration. Look for patterns online, or create your own. Start with a simple design and gradually progress to more complex projects, especially for beginners. Once you’ve your pattern, you can start cutting the tesserae into different shapes and sizes with safety goggles, gloves, and an apron. Create a unique art piece showcasing your style by combining different colours, shapes, and sizes.
Choosing Your Design
Decide on the pattern or design of your mosaic art to create a truly unique piece. Exploring design possibilities is a great way to get started. Consider finding inspiration in nature or classic works of art.
Select a colour scheme incorporating different textures and materials to create depth and interest. Experiment with materials such as glass, stones, porcelain, or seashells. Remember to include objects like buttons, bones, or metals.
When creating the design, opt for a simple pattern for beginners and more complex projects for the experienced. Divide large patterns into sections for easier execution. Embrace spontaneity and get creative!
Preparing the Surface
Select a suitable foundation for your mosaic, such as tables, planters, or birdbaths. Consider the base’s material, size, and shape before beginning surface preparation. Wood, terracotta, and glass are popular materials for mosaic bases, but you can also opt for metal or plastic. Ensure the base is strong enough to support the weight of the tesserae and grout.
Avoid bases with many notches, making it difficult to fit the pieces. Clean the base with water and a home cleaner or sand metal bases, and remove rust with a wire brush. Score them with a utility knife for plastic and rubber surfaces to ensure tile adhesion. Sand wood surfaces and apply a waterproof sealer to prevent moisture damage. Use the right adhesive for the base material to ensure a smooth and even surface.
With the right preparation, you can create a stunning mosaic art piece that’s sure to be admired.
Cutting the Tiles
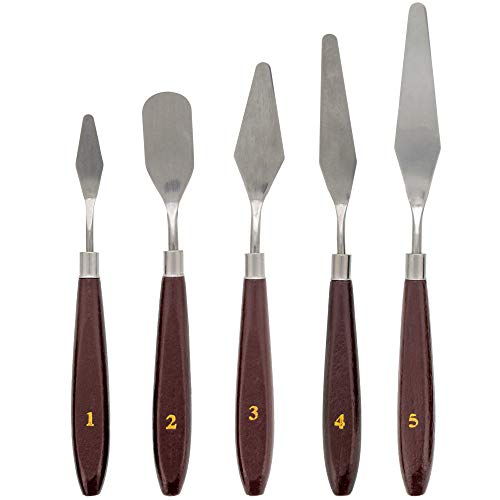
To create your masterpiece, gather various objects to cut into tesserae, such as buttons, bones, or metals. To achieve the desired design, use a variety of tile shapes and sizes. Keep safety in mind by wearing safety goggles, gloves, and an apron when cutting. Utilize mosaic tools for precision cutting and creating intricate patterns with cut tiles. Here are some tile-cutting techniques:
- Use a hammer for randomly sized pieces.
- Use tile nippers and cutters for straight lines and curves.
- Envision the shapes needed to fill the pattern while cutting.
- Adjust or replace pieces as necessary.
- Cut mosaic objects into different shapes and sizes.
- Create new pieces to fit the design better.
Follow these steps to create stunning mosaic art that will last for years.
Applying Grout
After cutting your tiles, it’s time to apply the grout to fill the creases between them and complete your masterpiece. Grout comes in various colours and textures for you to choose from, so don’t be afraid to experiment and pick one that stands out!
There are alternative grouting techniques, such as dry-grouting and epoxy grouting, to consider if you want to give your mosaic an extra layer of protection. When applying grout, it’s important to pay close attention to the texture and consistency of the mixture. It will only adhere correctly if it’s runny and must be redone. It may be challenging to spread evenly if it’s too thick. Also, use a damp sponge to clean off any excess grout before it dries.

Different types of materials require different grouting techniques, so it’s important to do your research beforehand. For example, glass tiles must be grouted with non-sanded grout, while stone tiles should be grouted with sanded grout.
Lastly, use grout to enhance the texture of your mosaic and make it truly unique. With the right grout colour and technique, you can create a complex, eye-catching design that will impress you.
- Editor’s Choice

- Best Seller
- Amazon Choice


Setting the Tiles
You’ve reached the exciting part of mosaic art- setting the tiles! To create a beautiful mosaic, it’s important to be precise with tile alignment and spacing. Before you start, ensure you have the right tile adhesive for the job. Once you’ve your materials ready, you can begin!
To ensure an aesthetically pleasing mosaic, focus on proper tile alignment. Use a ruler or other measuring device to space each tile evenly. Use tile adhesive to secure the pieces in place. Be sure to add an extra adhesive layer to tiles in high-traffic areas.
Finally, you’ll need to select a grout colour. Choose a colour that complements your tesserae and design. When applying the grout, use a spatula to fill the creases between the tiles. Remember to wipe off any excess grout as you go. Opt for grout colour options matching the tile adhesive for a professional finish.
Now that you know the basics of setting the tiles, you can get creative and make your masterpiece! Here are some tips to keep in mind:
- Use tile adhesive to secure the pieces in place.
- Focus on proper tile alignment and spacing.
- Select a grout colour that complements the tesserae and design.
- Apply the grout using a spatula and wipe off any excess.
Finishing Touches
To protect your mosaic from moisture damage, apply a waterproof sealer to give it the final touch. Create a stunning masterpiece with the perfect grout color options mosaic art techniques, and add embellishments for texture and dimension. Get creative with different adhesives and techniques to make your art unique. With the right supplies, you can craft stunning mosaic art for years.
Explore various grout colour options to find the best one that suits your project. You can use lighter shades for a subtle contrast or bolder colours to make a statement. Choose a grout that complements the tesserae, and make sure it has a waterproof sealer to protect against moisture and weather damage.
Adding embellishments and textures to the mosaic art can bring it to life. Use various materials to create unique shapes and colours. Buttons, beads, and stones are great materials to use. Attach them to the base with adhesive and grout for a stronghold.
You can also use different adhesive methods to secure the tesserae. Use a glue gun to attach light objects like beads and buttons. For heavier objects like stones, use a two-part epoxy adhesive. Make sure the adhesive is waterproof and heat resistant as well.
With the right materials and techniques, you can make beautiful mosaic art. Experiment with grout colours, adhesive methods, and embellishments to create a unique and eye-catching piece. With some creativity, you can craft a gorgeous mosaic art that will be admired for years.
Sealing the Finished Product
Now that you’ve finished your masterpiece, it’s time to seal the finished product. Applying a sealant is a crucial part of the mosaic-making process that can help protect your work from water damage, dirt, and other debris. Here are three types of sealants to consider: water-based, oil-based, and silicone-based. Each offers different benefits, so choose the most suitable option for your project.
When applying sealant, use a paintbrush to coat the tiles evenly. Cover all the nooks and crannies to ensure a protective layer. After the sealant has dried, it’s important to keep up with regular maintenance. Clean the surface with a soft cloth and warm, soapy water to keep the sealant in top condition. If necessary, reapply the sealant every few years to ensure maximum protection.
The benefits of sealing your mosaic are numerous. It can help to protect the colours of your tiles, ensure durability, and keep your masterpiece looking as good as new for years to come. With the right sealant and regular maintenance, your mosaic will remain beautiful for many years.


Caring for Your Mosaic Art
Proper care will make your mosaic art vibrant and beautiful for many years. Displaying your artwork correctly, protecting it from weather damage, cleaning and maintaining it, and repairing broken pieces are all crucial to keeping your mosaic art in peak condition. Incorporating mosaics into home decor can also help to maintain its beauty.
| Displaying | Protecting | Cleaning & Maintaining |
|---|---|---|
| Hang on walls | Avoid direct sun and rain | Dust regularly |
| Place on shelves | Apply sealant | Wipe with a damp cloth |
| Utilize stands | Use waterproof grout | Clean spills immediately |
Repairing any damaged tiles is also important. Use tile glue and a toothpick to fix small chips and replace larger sections with new tiles. Be sure to match the colour and texture of the original pieces.
Add a felt pad or a piece of wood to the bottom for larger pieces to protect the surface it’s placed on. Finally, add a coat of sealant every few years to keep the tesserae and grout looking as good as new.
Get Creative With Your Mosaic Art
Unleash your creativity and let your imagination take the lead as you explore the limitless possibilities of mosaic art! Get creative with your tesserae and incorporate found objects into the design. Experiment with different materials and explore colour combinations to create stunning works of art. Add texture and dimension with a variety of sizes and shapes.
Here are some ideas to get you started:
- Experiment with different materials such as stones, glass, porcelain, or seashells.
- Incorporate found objects such as buttons, bones, or metals.
- Explore colour combinations to add vibrancy and depth.
Be bold and embrace spontaneity. Play with texture and dimension, and use your creativity to produce unique, one-of-a-kind mosaics. Incorporate found objects and explore colour combinations to create beautiful, eye-catching works of art. Whether creating a mosaic pattern or a more abstract design, you can create stunning pieces of art that will last for years.
Conclusion
Mosaic art is an incredible way to express your creativity. It’s like painting a masterpiece with tiny pieces of glass, stones, and other materials.
With a bit of practice and patience, you’ll be able to craft stunning works of art that will last a lifetime.
So don’t wait; unleash your inner artist and get creative with mosaic art today!


