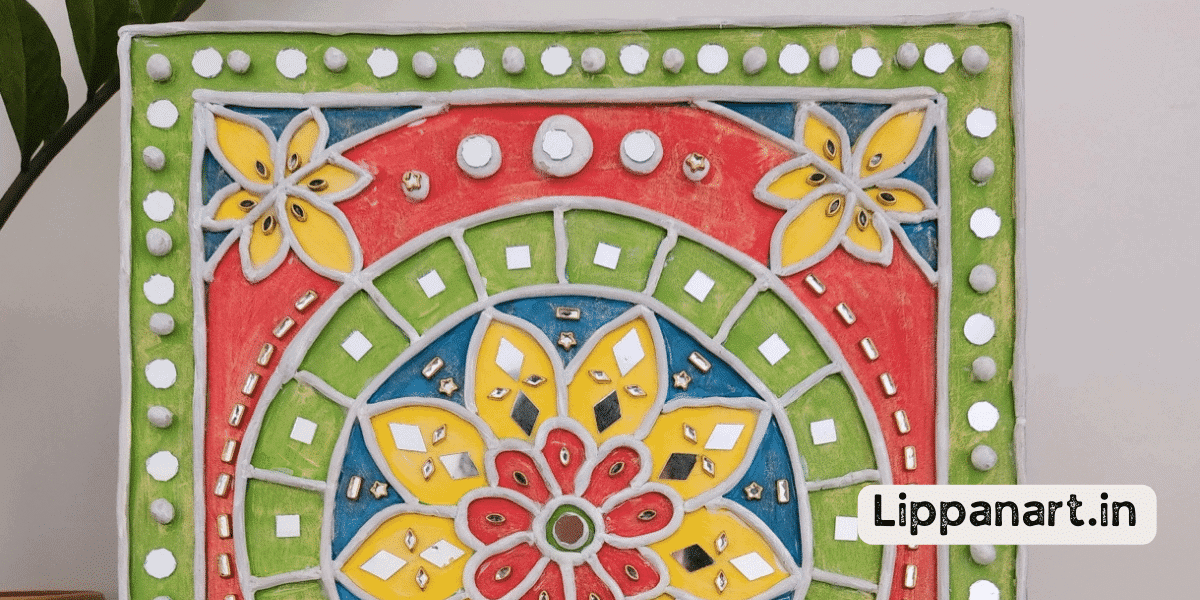
Troubleshooting lippan art on glass is like searching for the proverbial needle in a haystack. With the right tools and knowledge, however, you can create stunning artwork that will impress you.
This guide will help troubleshoot and prevent common issues with lippan art on glass.
We’ll explore ways to fix fading colours, adhesion problems, uneven texture, and more.
Get ready to unleash your creativity and make your unique lippan art!
Key Takeaways
- Ensure a clean working surface and use the right adhesive for smooth and even lippan art on glass.
- Use quality materials like colour-fast paint and mandala templates for precise lines and vibrant colours.
- Proper adhesion can be achieved by using a mirror kit suited to your needs and high-quality acrylic paint.
- Repair cracks and breaks by carefully reassembling broken pieces and applying sealant for long-lasting results.
Common Challenges in Lippan Art on Glass: A Troubleshooting Guide
Do you need help with lippan art on glass? Look no further–this guide will help you troubleshoot common challenges.
Working with mirrors and glass to create lippan art can take time and effort. You’ll need the right materials, like acrylic colour and mandala art, to get started.
First, make sure you have a clean surface to work on. Any dust or dirt will create bumps and unevenness in your art.
Next, use the right adhesive. Using the wrong adhesive could damage your glass or create a mess. You’ll also need to apply the adhesive evenly to avoid air bubbles.
Finally, be sure to use a steady hand and take your time. With lippan art, precision is key.
Following these steps should ensure your lippan art on glass is successful. So grab your materials and get creative!
Fading Colors and Blurred Lines: Resolving Visual Issues in Lippan Art
If you’re finding your lippan art on glass has fading colours and blurred lines, you’re not alone. To resolve this issue, there are a few steps you can take:
- Replace the acrylic paint with quality, color-fast paint.
- Use a mandala template to ensure the lines are crisp and accurate.
- Add a layer of clear acrylic sealant to lock in the colours.
- Apply the paint to the backside of the mirror to avoid smudging.
Quality acrylic paint and a mandala template will ensure a bright and vibrant display. Add a layer of sealant over the paint to lock in the colour. This will also protect the art from smudging and smearing. Applying the paint to the mirror’s backside will also help reduce the chance of smudging and blurring.
You can restore your lippan art to its original, vibrant glory using these methods. You can create beautiful, intricate designs with bright, defined colours with the right materials and techniques. You can troubleshoot and resolve visual issues in your lippan art on glass with a few simple steps.
Adhesion Problems: How to Fix Lippan Art Lifting from Glass Surfaces
When creating lippan art on glass, the key steps are to avoid adhesion issues and ensure that your art stays put.
First, start using a mirror kit specifically suited to your needs. To ensure proper paint adhesion to the glass surface, it is important to clean the surface thoroughly.
Next, it’s important to use high-quality acrylic paint and paintbrushes. The quality of your materials can greatly affect how well the paint adheres. Also, be mindful of the consistency of your paint – it should not be too thick or too thin, as this can cause the paint to lift off the surface.
If you’re shopping for supplies online, take the time to familiarize yourself with the store’s shipping policies. Ensure that the supplier is shipping items in a timely manner and that they are properly packaged to prevent any damage during transit.
Cracks and Breaks: Repairing Damaged Lippan Artwork on Glass
Repairing cracked or broken lippan artwork on glass can be tricky, but it’s possible with the right tools and knowledge. Here are a few steps you can take to get your artwork in top shape again:
- Gather the necessary materials: mirror cutouts, a glass bottle, material such as a glass bottle, and mirror-backed broken glass pieces.
- Clean the surface of the glass and apply white acrylic colour to the edges of the broken glass pieces. This will help keep the pieces in place when you reassemble them.
- Carefully reassemble the broken pieces and attach the mirror cutouts to the glass bottle.
- Finally, apply a sealant to the edges of the artwork to ensure it stays in place and lasts for years to come.
With the right tools and patience, you can easily repair any cracked or broken lippan artwork on glass. The key is to take your time and ensure each piece is properly secured before moving on to the next.
Uneven Texture: Achieving Smooth Lippan Art Surfaces on Glass
Creating a smooth texture on lippan art on glass can be challenging. With the right techniques, however, great results can be achieved.
When creating lippan art on glass, use a mandala tool to spread the glass colours evenly and smoothly. To achieve an even texture, use ceramic cones to apply the glass colours in a thin layer and cover all areas of the glass evenly. The lippan art will look best if there are no gaps or patches in the glass painting.
To ensure a smooth finish, use a clean, dry cloth to wipe away any excess glass colours to ensure a consistent layer. Finally, carefully inspect the glass for any unevenness and make necessary adjustments.
With these techniques, you can create a smooth and even texture on lippan art on glass.
Bubbles and Air Pockets: Eliminating Imperfections in Lippan Art
To avoid imperfections in lippan art, it’s important to eliminate any bubbles or air pockets. Here are four steps to ensure a smooth surface on glass:
- Clean the glass: Before applying the lippan art, ensure the glass is free of dirt and debris. A clean surface will help prevent air bubbles from forming.
- Mix the paste: Follow the instructions on your adhesive to get the right consistency. It will be challenging to spread evenly if it is too thick, resulting in air pockets.
- Apply the paste: Spread a thin, even layer of paste on the glass using a soft cloth. Make sure you cover all the areas, including the edges.
- Press out the air: Use a spoon or other flat tool to press out any air bubbles or pockets. This will help to ensure a smooth, even finish on your lippan art.
Stains and Smudges: Cleaning and Restoring Glass Lippan Art
If your glass artwork has become smudged or stained, don’t worry — you can easily clean and restore it.
To effectively remove dirt and dust particles, gently wipe the surface with a soft cloth.
Mix mild detergent with warm water. Clean the glass gently with a soft sponge; rinse often to avoid streaks.
If the stains persist, gently scrub them with baking soda and water.
For stubborn stains, a commercial glass-cleaning product may be necessary.
To restore the shine and get rid of streaks and smudges, use a dry cloth to buff the glass. Proper care and cleaning make your Lippan art glass look beautiful for years.
- Editor’s Choice
- Best Seller
- Amazon Choice
Weathering and Outdoor Challenges: Protecting Lippan Art in Open Spaces
Protecting your Lippan art glass from harsh weather and outdoor elements can be challenging. Here are four key strategies for protecting your beautiful glass art:
- Organize your outdoor space. Ensure your art is set up in a sheltered environment, such as a covered patio or balcony.
- Choose wisely. Select glass pieces that are durable and weather-resistant.
- Protect your art from the elements. Use a UV-resistant coating to reduce the effects of sun and rain exposure.
- Check regularly. Inspect your glass art for damage and repair it promptly.
Following these simple steps, keep your Lippan art glass beautiful and protect it from outdoor elements.
It’s important to remember that glass art is fragile and delicate and must be handled carefully. Proper maintenance and protection will make your glass art vibrant and beautiful for years.
Choosing the Right Sealant: Tips for Long-lasting Glass Lippan Art
Choosing the right sealant for your glass lippan art is important to ensure it stands the test of time. When selecting a sealant, consider cost, durability, and compatibility with your materials.
Additionally, understand the application process and environmental factors, such as temperature and humidity, as these can affect the sealant’s performance.
Selection Criteria
When selecting lippan art for glass, it’s important to consider the artwork’s size, colours, and design. To ensure long-lasting craft products, you’ll also want to consider the mirror shape, mirror size, and available return policies.
When choosing lippan art for glass, there are four important factors to remember.:
- Look for vibrant colours and detailed embroidery mirror designs to make the lippan art stand out.
- Choose a mirror size that will best showcase the artwork.
- Research return policies to ensure the craft product is of quality.
- Look for lippan art that is tailored to the shape of the mirror.
Application Process
Applying lippan art to glass requires a specific process to ensure the craft product is quality and lasts.
The process starts by selecting the right mandala art that best suits your business.
From there, you must arrange delivery details, including if you are delivering overseas.
Once all details are in place, follow the instructions for applying the mandala art to the glass.
Once complete, you’ll have a quality product that can be enjoyed for years.
Applying lippan art to glass is simple but requires exacting attention to detail to make your product successful.
Environment Factors
Considering the environment is essential when creating your craft product, as the temperature, humidity, and air pressure can affect the outcome. Working on a Lippan Art project on glass requires special attention to these factors.
Here are the four key considerations for successful craft projects:
- Temperature: Ensure you work in an area of 70-75 degrees F.
- Humidity: The humidity should stay between 40-60%.
- Air Pressure: The air pressure should not exceed 30.5 inches of mercury.
- Mandala Art and Mosaic Wall Stickers: When working with these materials, keep them away from direct sunlight and heat sources.
Preventive Measures: Maintaining the Integrity of Lippan Art on Glass
To preserve the integrity of lippan art on glass, it’s important to take preventive measures. Utilizing beautiful cut mirrors and lippan art mandala art can help to reduce the breakage rates and ensure the longevity of your art.
One of the keys to success is using mosaic wall stickers, mosaic stick tiles, mirror sheets, mosaic stickers for home, kitchen, and bathroom wall decoration, and DIY crafts with the right shape mirror. This will provide protection and the lowest breakage rates possible.
Additionally, it’s important to take the time to inspect the glass for any signs of wear or damage. If any damages are found, it’s important to take the necessary steps to repair them before continuing with the lippan art.
Conclusion
You won’t believe the difference troubleshooting lippan art on glass can make!
Your artwork will look brighter, sharper, and more vibrant. Every line and colour will stand out, and you won’t have to worry about adhesion issues.
Plus, your artwork will stay pristine for years to come.
With these simple steps, you’ll be able to enjoy the beauty of your lippan art on glass for a lifetime!


