
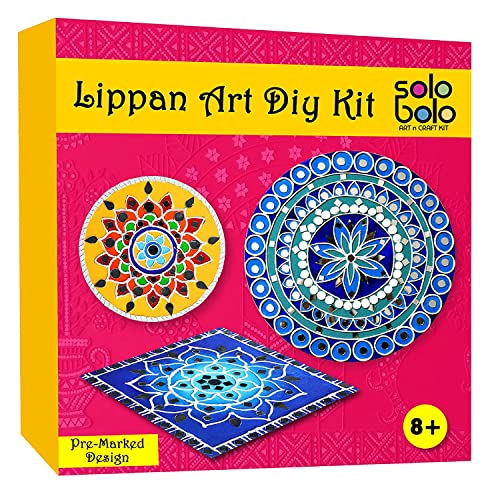
Are you looking to explore the creative possibilities of lippan art? This unique art form is made from mud and can transform any surface into a beautiful, captivating work of art.
In this article, we’ll guide you through the basics of mud preparation for lippan art, covering the materials needed, applying the mud, and tips for preserving the artwork.
Ready to get started? Let’s dive into the world of lippan art!
What Is Lippan Art?


You may be wondering what lippan art is – ancient Indian folk art. This painting style is made by skillfully applying mud on walls, often on a flat surface or in a curved shape, and then decorating it with traditional designs, patterns, or symbols.
While this art form has a long history with cultural significance, it has gained traction in the modern era thanks to its environmental impact. Lippan art is a great way to reduce plastic waste, as mud is a natural, reusable material.
At the same time, lippan art is an aesthetically pleasing way to decorate walls or furniture. It can bring colour and life to a room, as the mud can be mixed with various natural colours. The best part about this art form is that it is versatile, with both traditional designs and modern trends available.
With its long history, lippan art is a great way to show off your creativity and style.
What Materials Are Used in Lippan Art
Materials used to create lippan artwork include clay, dry soil, sawdust, straw, and cow dung. These materials are vital for creating unique patterns and selecting the perfect colours to bring the artwork to life.
The mud mixture must be sealed properly to ensure it dries correctly and the texture is just right. You’ll need to mix the materials in the right proportion and allow the mud to dry for the right time.
You can create stunning lippan art with the right materials with patience and practice.
How to Mix the Mud for Lippan Art
Mixing the right combination of ingredients is essential for creating beautiful lippan artwork. To ensure success, you’ll need to understand the basics of mud preparation.
Start by selecting the right mixing ratios for the mud, ensuring that the ratios are appropriate for your chosen design. The optimal consistency will depend on the design size and complexity. To achieve this, you may need to adjust the amount of mud and water accordingly.
After mixing the mud, it’s important to store it in a container that prevents moisture from evaporating. This will help to ensure the mud is still pliable when you return to the project.
When colouring your mud, it is important to remember that the drying time of the mud will affect the final colour. Adding too much colour may result in a muddy-looking hue once the mud has dried. So, using just enough colour to achieve the desired hue is important.
Finally, if the consistency of the mud is too dry or wet, you can adjust it by adding more water or mud.
With the right mud preparation, you can achieve amazing lippan art.
Tools Needed for Lippan Art

To create beautiful lippan artwork, you’ll need a few specialized tools. You’ll need a hard surface suitable for decoration, such as a board or clay plate.
You’ll also need a good selection of colours and decorating ideas, such as beads, stones, shells, and other materials for surface treatment. You’ll need your creative instincts to develop a unique design when it comes to colour combinations.
To complete the design elements, you’ll need an artist’s brush and a few simple tools to help you apply the mud.
- Editor’s Choice

- Best Seller
- Amazon Choice


Techniques for Applying Mud to a Surface
Using your artist’s brush, you can apply the mud to the surface in various techniques to create a unique design. From creating textile prints to clay sculpture, lippan art has limitless possibilities for wall designs. Here are a few techniques to explore:
Pattern Making:
- Use a stencil or freehand to draw a design.
- Layer colours to create a complex pattern.
- Add surface texture with stamps or hand-carved tools.
Clay Sculpture:
- Cut a sheet of clay into shapes using a knife or a cookie cutter.
- Build up a relief sculpture with clay.
- Use a rolling pin to create a textured surface.
Wall Designs:
- Paint the wall with a brush or roller.
- Layer mud to create a 3D mural.
- Use a sponge to create texture and movement.
With imagination and experimentation, you can create unique designs with lippan art. There is no limit to the innovative and creative techniques you can discover as you explore this versatile medium.
Tips for Working With Mud
Now that you know the techniques for applying mud for your lippan art, let’s move on to the tips for working with mud.
Remembering ageing mud is key to a successful lippan art project, so allow it to sit for a few days before you begin working with it.
When drying mud, do so in a well-ventilated and dry area.
To seal the mud, use a sealant appropriate for the type of mud you use.
If you have leftover mud, put it in a sealed container and store it in a cool and dry place.
Finally, always clean your tools and hands with soap and water after you finish working with the mud to make sure the mud does not harden and becomes difficult to remove.
With these tips, your lippan art project will be a success!
Troubleshooting Common Issues With Mud
If you encounter any difficulties while working with mud, some troubleshooting tips can help. Here are some common issues and tips for resolving them:
Storing Mud
- To prevent air bubbles from forming in the mud, store it in an airtight container.
- Do not mix the mud with any other material.
- Remember to cover the surface of the mud with a layer of water to prevent it from drying out.
Sealing Mud
- To prevent the mud from cracking, seal it properly with a sealant.
- Before applying the next sealant layer, wait until each thin layer dries completely.
Drying Mud
- Place the mud in an area with low humidity and good air circulation to ensure even drying.
- Allow the mud to dry slowly, away from direct sunlight.
These tips will ensure a successful mud project and prevent common issues. With the right approach, you can make the most of your creativity and create something truly special!


How to Preserve Lippan Art
To preserve your Lippan art, it’s important to take the right steps.
After painting your designs, give the mud enough time to dry. This will help prevent mud cracking and flaking.
While drying, you should also apply a few finish coats to protect the art.
Make sure that you mix the right colours together when preparing the mud. This will help ensure that the art remains vibrant and true to your original design.
Finally, you should keep the art away from direct sunlight and other heat sources. This will help preserve the art for a longer period.
With proper preparation and maintenance, Lippan art can last for generations.
Frequently Asked Questions
What Types of Surfaces Are Best for Lippan Art?
When choosing a surface for lippan art, texturing the surface and adjusting humidity levels can help you get the best results. Consider your colour choices, sealing designs, and adding protective layers for a creative, innovative design.
How Long Does It Take for Mud to Dry for Lippan Art?
It takes about 4 hours for the mud used in lippan art to dry. Mixing clay, colouring mud, building forms, and careful packing with soil selection, all play a role in the process. Innovate your technique to reduce drying time and create stunning art!
What Is the Best Way to Store Mud for Future Use in Lippan Art?
To ensure your mud lasts, consider souring it, varying textures, and sealing it with paint combinations. Try different storage options to preserve the best texture and avoid souring. Use our tips for maximum longevity and innovation.
Are There Any Safety Precautions to Consider When Working With Mud for Lippan Art?
When working with mud for lippan art, consider dyes, texture, tools, health risks, and storage solutions. To avoid contact with hazardous dyes, it is recommended to wear gloves, a mask, and protective clothing. Choose tools that won’t alter the texture of the mud. Find proper storage solutions to keep mud from spoiling. Be innovative, and stay safe!
Conclusion
You’ve come a long way in learning about lippan art and how to prepare the mud for it. By now, you’re an expert in mixing and applying the mud to a surface. You understand the tools and techniques needed for a successful piece of art.
And if something doesn’t work out, you know how to troubleshoot and fix it. With all the knowledge you have now, you are on your way to creating a masterpiece that will stand the test of time!


