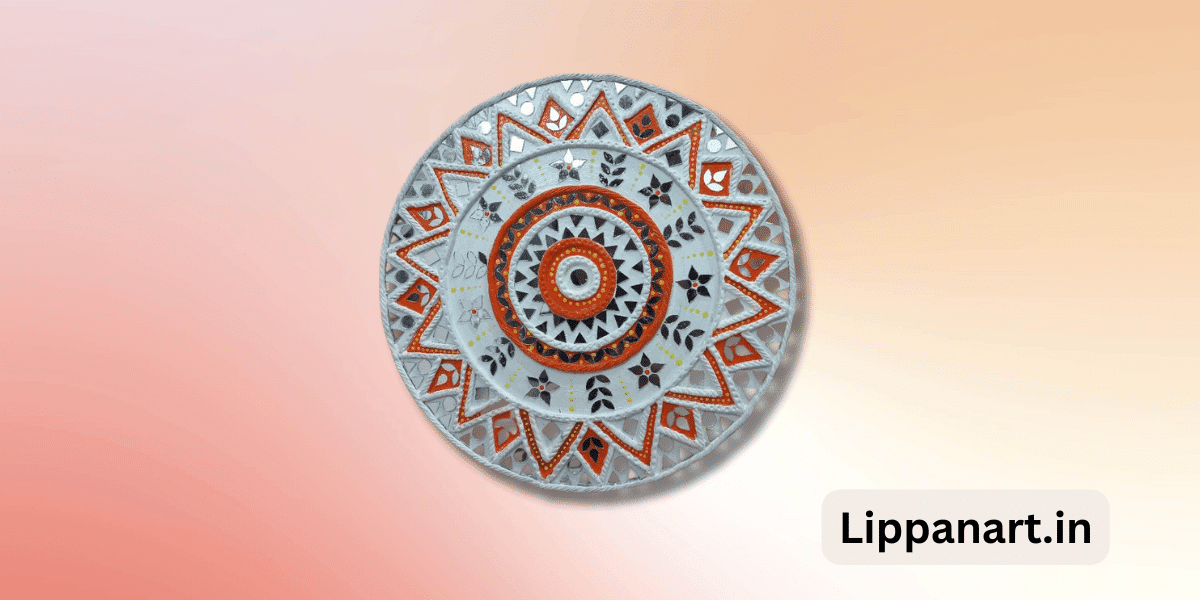
Unlock your creative potential by learning to use plasticine clay for lippan art! You can create beautiful, intricate designs that can be enjoyed for years through this ancient art form.
Contrasting smooth and textured surfaces, vibrant colours, and unique patterns, lippan art with plasticine clay will bring your ideas to life. With suitable materials, techniques, and patience, you’ll be crafting lippan art masterpieces in no time.
Let’s dive in and discover the world of plasticine clay lippan art!


Preparation for Lippan Art with Plasticine Clay

Preparing for lippan art with plasticine clay is easy! Before you start, gather the necessary supplies. You will need some plasticine clay, a rolling pin, some parchment paper, and simple tools for shaping and carving. If you don’t have the tools, you can use objects around the house, like a spoon or a butter knife.
Once you have everything ready, you are ready to start creating.
Roll the clay out on the parchment paper using your rolling pin until it is about 1/4 inch thick. Roll it evenly so the shapes you create will be even. Then start creating! You can use the tools to carve out shapes or use your hands to make a design. Remember to have fun as you work with the clay and create your lippan art.
Once you are done, you can bake the clay in the oven to make it permanent. This will also give your art a glossy finish. Ensure you read the clay packaging instructions for the baking time and temperature. You can use your finished lippan art as a decoration or gift when it’s done.
Plasticine clay is great for lippan art because it is easy to work with and comes in various colours. Plus, you can create anything you can imagine. So grab some clay and get started!
Choosing the Right Plasticine Clay for Your Lippan Design
Choosing the right type of clay for your lippan design is key to creating a successful piece of art. It can be challenging to select the right type of clay for your lippan kaam, as so many varieties are available in the market. To help you make the right decision, here is a comparison between different types of clays.
| Type | Clays | Uses |
|---|---|---|
| Modelling | Shilpkar, Jovi Air-dry, Mouldit, Unpainted | Walls, Figurines, Sculptures, Artifacts |
| Pottery | Wet, Air Dry | Village Ladies, Clay Art Form, Acrylic Paints, Art Projects |
| Jewellery | Clay Balls, Clay Ropes, Clay Fridge Magnet | Clay for Pottery Classes, Clay for Lippan, Clay Peacock |
| Crafting | Clay Roller, Clay Sheets, Clay Strips, White Clay | Grams of Clay, Traditional Clays, Clay for Pottery, Jovi Clay |
The type of clay you need for your project will depend on the design you want to create. Shilpkar clay is ideal for creating Ganesh figurines, while clay balls are great for making clay jewellery. If you want to make clay sculptures, air dry clay is best for crafting clay art projects. For creating intricate designs, use clay strips and clay sheets. And if you want to make clay artefacts, traditional clays like Mouldit and Jovi air-dry modelling clay are perfect for you. So, pick the right type of clay for your lippan kaam, and you’ll be on your way to crafting beautiful, innovative art pieces.
Basic Techniques for Manipulating Plasticine Clay in Lippan Art
Once you’ve chosen the right clay for your project, mastering basic techniques is essential for creating beautiful lippan art. With the right skills, you can bring your designs to life.
Clay Modelling:
- To achieve the desired shape, utilise your hands, a rolling pin, or any other appropriate tools to mould the clay.
- For a more detailed design, use small clay pieces to create intricate patterns.
Painting:
- Once the design is complete, you can use a variety of brushes to paint it with vibrant colours.
- You can also use acrylics for a more sophisticated look.
These simple techniques allow for endless possibilities when creating lippan art. By utilising your creativity and imagination, it is possible to turn a shapeless mass of clay into a magnificent work of art.
Creating Intricate Patterns and Designs with Plasticine Clay
Getting creative with intricate patterns and designs can help take your lippan art to the next level. To create unique and eye-catching shapes and designs with plasticine clay, it’s important to equip yourself with the right tools. Clay modelling tools, clay art projects, and clay shapers are essential for this creative expression. You can refine and shape your plasticine clay into any desired design with the right tools.
You’ll need to use various techniques to start creating intricate patterns and designs with plasticine clay. To create the desired pattern, first, roll the clay into a thin sheet and then use a clay shaper to carve it out. If you want to create a more complex design, try combining different elements. For example, you can combine dots, lines, and curves to create a beautiful floral pattern.

You can also use clay modelling tools to create intricate shapes and designs. Cut out the desired shape from the clay and then use the clay modelling tools to add texture and depth. Use a clay shaper to add fine details to your piece to make a more realistic design.
Use a clay shaper to add the final touches to finish your intricate design. Use your clay shaper to create a smooth, professional finish by blending the edges and adding any small details. You can create beautiful, intricate patterns and designs with plasticine clay with the right tools and techniques.
Layering Plasticine Clay to Add Depth and Texture in Lippan Art
By layering your clay, you can add layers of depth and texture to your lippan art. Working with clay modelling is a creative process that allows you to bring your visions to life with an innovative touch.
Here are some tips to help you get started:
- Preparing the Clay:
- Use a round brush to remove any dust or debris from the clay.
- Knead the clay until it’s soft and pliable.
- Layering the Clay:
- Start from the base by rolling a thin sheet of clay and pressing it onto the surface.
- Layer the clay, making sure to press and flatten each layer firmly.
- To achieve a polished look, it’s recommended to use a moistened cloth to even out the edges and clean the surface.
- Editor’s Choice

- Best Seller

- Amazon Choice


Incorporating Colors into Your Lippan Art Using Plasticine Clay
Bringing colour to your artwork is an exciting way to add vibrancy and life to your creations. With lippan art, you can incorporate colour using air-dry clay and colour paint.
Using an array of clay modelling tools, you can blend the clay to create a striking palette of colours. You can also create colourful designs and patterns to express your creative flair.
To mix the clay, roll out thin strips and cut them into small pieces. Place the pieces on a flat surface and use a rolling pin to press them together. Then, use a palette knife to mix the clay. Adding a few drops of colour paint to the clay creates a unique hue.
Experiment with adding different colours to the clay to create interesting tones and shades. Use your imagination to explore the vast possibilities that await you!
Finishing Touches: Refining and Polishing Plasticine Clay Lippan Art
Once you’ve achieved the desired look, it’s time to refine and polish your plasticine clay lippan art. For those seeking a truly creative and innovative approach, there are several steps you can take to perfect your art:
- Clay Modelling: Use a clay modelling tool to smooth any ridges or sharp edges that may be present. Utilise small wax tools to add intricate details to the design.
- Acrylic Painting: Use a thin brush to paint the clay with acrylic paint. Add subtle highlights and shadows to bring your design to life.
- Decorative Items: Embellish your design with decorative items like beads, sequins, or glitter. Create an eye-catching border to draw attention to your art.
Preserving and Caring for Plasticine Clay Lippan Creations
Caring for your plasticine clay lippan creations involves taking steps to preserve them for years to come. Start by storing the clay in airtight containers or clay moulds. Seal the containers with plastic wrap to prevent the clay from drying out. In case the clay becomes dry, you can restore its moisture by adding a few drops of vegetable oil or glycerin. You should also keep the clay away from direct sunlight to prevent fading.
You can apply a coat of clay acrylic paint or sealer to protect the art piece from damage. This will also help to prevent mould growth. Additionally, if you want to hang the artwork on a wall, use a backing board and solobolo lippan art clips for a secure fit.
| Materials | Usage |
|---|---|
| Clay moulds | Storing clay |
| Clay acrylic paint/sealer | Protecting art pieces |
| Solobolo lippan art wall clips | Hanging art pieces |
| Vegetable oil/glycerin | Reviving clay |
Advanced Tips and Tricks
Try some advanced tips and tricks to make your creations even more beautiful and long-lasting! Here are some techniques to help you get the most out of your Dry Modelling Clay:
Design:
- Use a rolling process to help you create intricate patterns and designs.
- Experiment with different shapes and sizes of plasticine clay to create unique art.
Finishing Touches:
- Add a glaze to your art for a polished, professional look.
- Use a sealant to protect your art from damage and fading.
These tips will help elevate your art to maximise your Dry Modelling Clay.
With a little creativity and effort, you can transform your plasticine clay into a unique piece of art. So, get creative and explore the possibilities of Dry Modelling Clay!


Frequently Asked Questions
How Long Will My Plasticine Clay Lippan Art Last?
Your plasticine clay lippan art can last for years when made with care. Proper care and storage allow your art to be enjoyed for a long time. Innovate with confidence and create something remarkable!
Is Plasticine Clay Safe to Use?
Yes! Plasticine clay is safe and a great way to express creativity. It’s non-toxic, durable, and easy to shape, perfect for creating unique lippan art.
What Other Materials Can I Use in Combination With Plasticine Clay?
“You can get creative with your materials! Alongside plasticine clay, use other mediums such as oil paints, chalk, and glitter to add texture and colour. Don’t be afraid to experiment and explore different options; as the saying goes, “the sky’s the limit”!
How Can I Get Creative With Plasticine Clay Lippan Art?
Get creative with lippan art by experimenting with different colours and textures of plasticine clay. Try combining different shapes, sizes, and hues to create unique patterns and designs. Have fun and explore!
What Is the Best Way to Store Plasticine Clay Lippan Art?
Have you ever wondered how to preserve your beautiful plasticine clay lippan art best? Store clay in a cool, dry place away from sunlight and moisture. To keep it flexible, make sure to store it in a container that’s airtight.
Conclusion
You’ve now mastered how to use plasticine clay for lippan art. From choosing the right clay to creating intricate designs, layering and adding colour, you’ve explored the many possibilities of this versatile medium.
And by investigating the truth of the theory that plasticine clay lippan art can be preserved and cared for, you’ve created a lasting masterpiece that you can be proud of.
So go ahead and show off your lippan art – you’ve earned it!


