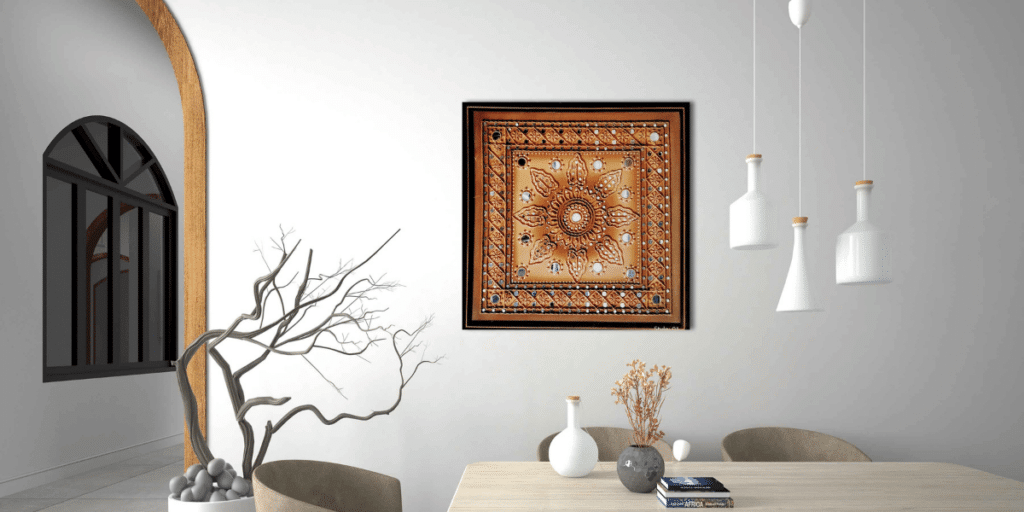
Are you ready to take your wall art to the next level? Adding a lippan art piece can be the perfect way to spice up your space and show off your creative side.
With a few simple steps, you can easily hang a lippan piece and transform your wall into a stunning display of light and colour.
Discover the secrets of hanging lippan art on your wall and enjoy a beautiful, eye-catching accent in any room.
Key Takeaways
- Enhance the display of lippan art with well-placed lamps and experiment with different types of lighting.
- Secure lippan art on the wall with the right hooks and anchors for your wall material, and ensure a secure and stable display.
- Hang lippan art at eye level to achieve eye-level elegance and showcase intricate details.
- Create an evenly spaced arrangement of lippan art using a wooden board for a traditional touch, and ensure even spacing and level hanging.
Accents with Lighting
Brighten up your lippan art with lighting accents by adding a few well-placed lamps around it! This traditional craft, which has been passed down through generations, utilizes a unique clay art form and mirror work to create eye-catching designs. With vibrant colours and intricate patterns, lippan art looks even more captivating when illuminated.
To make the most out of your lippan art, experiment with different types of lighting. Consider placing a few lamps in areas around the artwork to illuminate its intricate details and enhance its overall beauty. Not only will this add a creative touch to your home, but it will also be a conversation starter.

Secure with Anchors or Hooks
Secure your lippan art with anchors or hooks so it won’t fall off your wall! Hanging lippan art can be a great way to add a unique and creative touch to any room in your home. Here are four ways to ensure your lippan art is securely mounted to the wall:
- Choose the right type of hooks and anchors for your wall material. For a brick wall, use heavy-duty anchors and screws, while for drywall, use plastic anchors and screws.
- Mark the wall in the right spots with a pencil to indicate where the lippan art should be hung. This will help you to make sure the art is hung in the correct spot and is level.
- Utilize a stud finder to identify the studs within the wall, and if feasible, mount the lippan art onto the studs. This will provide the most secure mounting option.
- Adjust the hooks or anchors as needed to fit the lippan art’s mounting hardware. Make sure to use screws and anchors that are the right size and material for the wall and mirror decor.
Following these steps will help you securely hang your lippan art on the wall and ensure it’s the perfect addition to your home!
Eye-Level Elegance
Hang your lippan art at eye level regularly to add a touch of elegance to your space!
Lippan art is a traditional Indian folk art from the Kutch region of India. It’s made from clay and is characterized by its intricate designs.
To achieve an eye-catching look, place your lippan art at eye level to really bring out the intricate details. By doing so, you can create a stunning visual effect that will really draw attention to your artwork.
When hanging your piece of lippan art, it’s important to make sure it’s level and secure. Use anchors or hooks to make sure it doesn’t move or wobble when hung. This will ensure that your lippan art is displayed elegantly and beautifully.
Hanging lippan art at eye level is a great way to bring a unique and innovative look to your space. The intricate designs and vibrant colours of lippan art render it a captivating masterpiece, infusing your home with a touch of culture and beauty.
- Editor’s Choice
- Best Seller
- Amazon Choice
Evenly Spaced Arrangement
To achieve a visually pleasing look, arrange your lippan art evenly and securely. Here are a few tips to keep in mind:
- Create a traditional touch with a wooden board – it’s a great way to display your art pieces and will give an elegant and warm feel to your space.
- Consider the size of the canvas – it’s important to make sure that each piece is spaced evenly and hangs at the same level to create a balanced look.
- Brighten up your walls with lippan art – the vibrant colours and intricate designs will bring a cheerful vibe to your home.
- Celebrate your closest friends – why not hang a lippan art piece that celebrates your closest friends or loved ones?
Precise Measurement
To ensure your lippan art is hung properly, measure twice and hang once. Product dimensions are essential when creating a visually pleasing arrangement on your wall. Taking the time to ensure each acrylic colour, mud mirror, and size brush is precisely measured will make a world of difference.
Before commencing the hanging process, retrieve a measuring tape and ascertain the dimensions of the wall space where the lippan art will be displayed. Use this same measurement to determine the correct size mirror for your wall. If necessary, make small adjustments to ensure each item is perfectly spaced and aligned.
When measuring the lippan art, be sure to pay special attention to the product dimensions. To make the most of the wall space, adjust the measurements accordingly. If you have multiple items, take the time to envision the finished product before attaching the pieces to the wall. This will help you better determine the exact measurements needed for a cohesive design.
With patience and precision, you can create a stunning arrangement of lippan art that will make your space truly unique.
- Editor’s Choice
- Best Seller
- Amazon Choice
Complementary Colors
When selecting colours for your lippan art, choose complementary hues that will enhance the overall effect. Lippan kaam is a traditional mural craft from Gujarat, India, making use of a combination of board, clay, mirror art and vibrant colour palettes. To make your wall look beautiful and stand out, follow these steps:
- Look for colours that contrast and complement each other.
- Choose colours that are vibrant and create a dynamic effect.
- Consider the wall and room’s existing colour palette when selecting hues.
- Incorporate traditional lippan kaam designs to bring an ethnic feel to the wall.
By carefully selecting the perfect combination of complementary colours for your lippan art, you can create a stunning wall feature that will become a talking point for many years to come.
By selecting the appropriate colour palette, you can craft a stunning piece of art that breathes life into your room and garners admiration from all who see it.
Gentle Cleaning with a Soft Cloth
With a soft cloth, gently clean your lippan art to maintain its vibrant colours. Lippan art is a craft that involves creating vibrant designs on a fiberboard, making it perfect for adorning your wall. As the art is made with traditional embroidery designs, it’s important to use a soft cloth when cleaning it. This will help to ensure that the art remains intact without any damage to the intricate patterns.
Using a soft cloth also helps to avoid any scratches that can be caused by using a harsher material. To clean your lippan art wall, simply dampen the cloth with lukewarm water and then gently wipe the art. You may also use a mild detergent or soap if your lippan art is very dirty. Make sure to only use a small amount of soap, as too much can damage the fibres of the board.
Once you’re done cleaning, simply let the lippan art air dry. It’s important not to rub the art too vigorously, as this can cause the colours to fade or even damage the board. With gentle cleaning, it’s easy to keep your lippan art looking beautiful and vibrant for many years to come.
Conclusion
Hanging lippan art on your wall is a straightforward and enjoyable method to infuse a distinct, personal flair into any room. By incorporating suitable lighting, secure anchors, and precise measurements, you can ensure that your art graces the ideal spot.
Plus, with the right combination of colours, you can make sure your art stands out. According to a recent survey, 74% of people said that artwork in their home made them feel calmer and more relaxed.
With the right lippan art, you can make your home reflect your personality and enjoy the calming effects of art.


