You may wonder why anyone would want to use air-dry clay to create lippan art. After all, this traditional Indian decorative art form has been practised for centuries!
But if you want to make something truly unique and innovative, air dry clay is the perfect medium to use. Following a few straightforward steps, you can make a beautiful work of art that will make a statement and add elegance to any room in your house.
Read on to learn more about this amazing art form and how to create your lippan masterpiece!


History of Lippan Art

You may already be familiar with the materials and techniques used to create Lippan art, but the tradition dates back centuries. Artisans in India’s Kutch region have practised it for generations.
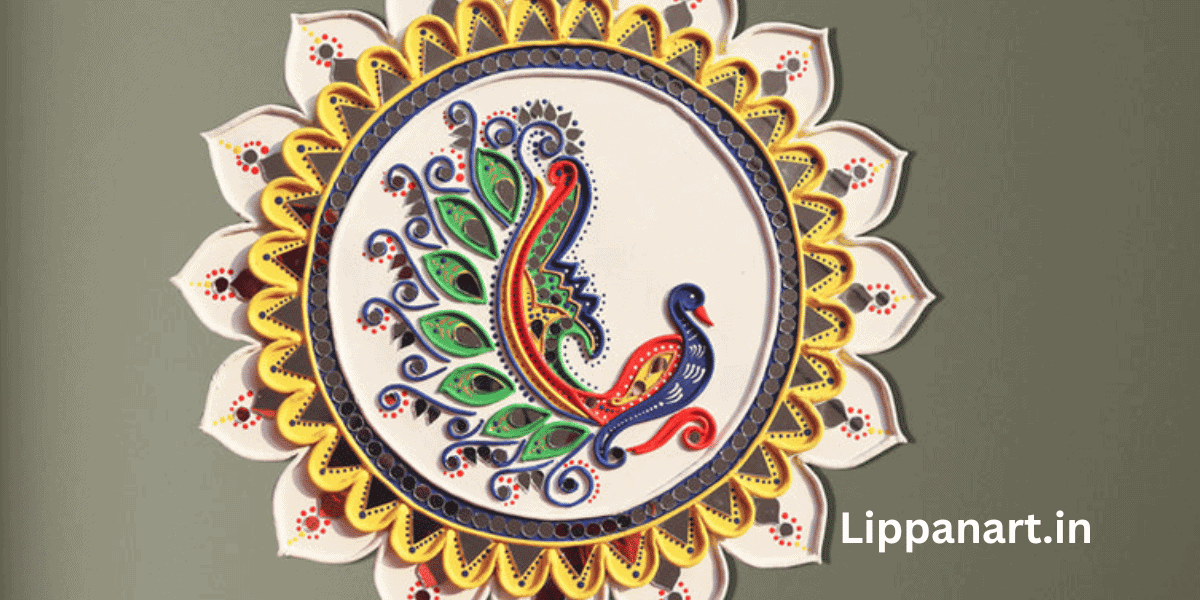
It is an innovative form of wall art that uses air dry clay, mirrors, and brushes to create intricate, geometric designs. The origin of art dates back to the 16th century, and it was originally used to decorate homes and palaces.
It has also been used to adorn temples and monuments. The process of creating the art is quite complex, yet the results are stunning. The art is often used to bring a burst of colour to any space, and mirrors and air-dry clay allow for unique patterns and accents.
Lippan art is an amazing form of art that continues to be practised and appreciated today.
Types of Air Dry Clay
You’ll need to choose the type of air-dry clay that best suits your needs for your project. When crafting lippan art, consider the characteristics of each type of clay:
- Mouldit Clay – this clay is incredibly versatile and durable, so it’s great for creating intricate designs and maintaining the polished finish of your lippan art mirror.
- Air Dry Clay for Art and Craft – this clay is lightweight and easy to work with, perfect for making detailed shapes and designs.
- Brush Round Series – this clay is ideal for creating larger pieces with a smooth, glossy finish.
- Lippan Art Mirror – this clay is designed specifically for lippan art and is simple to work with, giving you great results quickly.
Preparing the Clay
Before starting your project, it is crucial to prepare the clay by kneading it until it becomes soft and malleable. This ensures you get the best results when creating lippan art with air-dry clay.
To make sure that your clay is of the highest quality, you’ll want to use a clay powder such as Jovi Air-dry Modeling Clay. This clay powder can be mixed with water and kneaded until it is workable.
You can also use clay moulds to shape the clay into the desired form. By preparing the clay properly, you can create amazing and innovative lippan art pieces.
Creating the Base
Cut a piece of MDF board to the desired size and shape for the base of the artwork.
Use your mediums of choice – clay, paints, and other materials – to create the desired shapes.
Use a compass and protractor to mark out circles, draw petal shapes, and then roll the clay to create the petals.
Cut the clay into equal portions to create the small petals, and glue them in the centre.
Layer the petals by gradually increasing their size and adding clay strips in leaf shapes.

Finally, use two shades of green paint for the leaves and two shades of yellow for the petals.
Create stunning and imaginative artwork suitable for use as wall decoration.
- Editor’s Choice

- Best Seller

- Amazon Choice


Applying the Designs
Using a 3D outliner, draw lines on the leaves for added texture and dimension.
With a painting brush and acrylic colour set, create intricate designs to enhance the overall look of your lippan art.
Use air-dry wet clay to create shapes for each stroke, giving the decors a unique and creative flair.
To add depth, apply multiple layers of paint and use deeper shades to bring out the details.
Experiment with different colour combinations to achieve the desired effect.
Finishing Touches
To finish off your lippan art masterpiece, you’ll need a few supplies. Gather your brushes, air-dry wet clay, and a lippan art painting brush.
Start by using your acrylic colours to paint the flower details with a matte finish. With the right combination of colours, your artwork can come to life and offer a unique gift to your loved ones.
Next, use the painting brush to add the details of the leaves and petals. Take your time to create intricate and realistic designs.
Finally, use the air dry clay to create the stem. Mould and shape it to your desired length and thickness.
By selecting the perfect blend of colours and textures, you can craft a one-of-a-kind and stunning work of art that can adorn your living space or serve as a thoughtful present.
Tips for Working with Air Dry Clay
Working with air dry clay can be intimidating, but with a few tips and tricks, you can easily create beautiful clay pieces!
Modelling clay, air dry wet clay, gachwala terracotta clay, and polymer clay are all types of air dry clay.
Start with a smooth surface and knead the clay until it’s soft and pliable.
Roll the clay into thin strips to create petals and leaves, or use a clay knife to create detailed designs.
Allow the clay to dry completely before adding colour.
Use multiple layers of paint for a vibrant finish.
For the final touches, add mirrors and other embellishments to complete your creation!
With these tips, you can craft unique works of art with air-dry clay.
- Editor’s Choice

- Best Seller

- Amazon Choice


Caring for Your Lippan Art
After learning the fundamentals of working with air dry clay, it’s important to understand how to maintain your lippan art properly.
For starters, make sure you use gachwala mouldit clay, a air dry wet clay designed for children and professional artists for modelling any project art and craft. Use quality materials such as clay, acrylic paint, and perfect brushes.
Place your lippan art on an MDF board and avoid direct sunlight to ensure it stays in tip-top shape. You should also regularly dust it to remove any dirt and debris.
Lastly, consider spraying it with a protective coating to ensure it stays intact for years to come.
With the right care, your lippan art will remain beautiful and vibrant for years!
Displaying Your Creation
Once you’re done, you’ll want to display your beautiful creation for all to admire! Show off your work with pride by using the following tips:
- Use a plate of size to display your lippan art.
- If you made the art with shilpkar clay, mount it on a wooden frame or a cloth-covered board.
- If you use air-dry clay for jewellery, you can hang it up with a hook.
- Use craft mirrors or moulding clay to create a unique background for a more decorative look.
With creativity, you can make your lippan art stand out and be a true conversation starter! Show off your art with pride and enjoy the admiration of your peers!


Frequently Asked Questions
How long does air-dry clay usually take to dry?
Air-dry clay usually takes 3-4 hours to dry, depending on the thickness of the clay. It’s a great way to quickly create beautiful artwork without firing a kiln. By exercising patience and creativity, you can produce captivating masterpieces that will endure for years!
Is air dry clay safe to use for children?
Yes, air dry clay is safe for children to use. It’s a great way to explore creativity and develop fine motor skills. It’s also non-toxic and doesn’t require any baking. Enjoy creative fun with your kids!
Does the type of clay used affect the finished product?
Yes, the type of clay used will affect the finished product. Investigate the properties of air dry clay to understand how it affects the results, such as drying time, weight, and colour. Try out various types of clay and conduct experiments to produce one-of-a-kind, creative artworks that distinguish themselves from others.
Is lippan art suitable for outdoor use?
Lippan art is not suitable for outdoor use, as it is delicate and susceptible to damage from weather, UV light, and other environmental elements. Protect your artwork with a sealant or a UV-resistant coating for long-term protection.
Do I need any special tools for creating lippan art?
Creating lippan art requires special tools, such as MDF board, acrylic paints, clay, a compass, a protractor, mirrors and glue. With these, you can craft innovative, beautiful pieces that can be used for interior decor.


