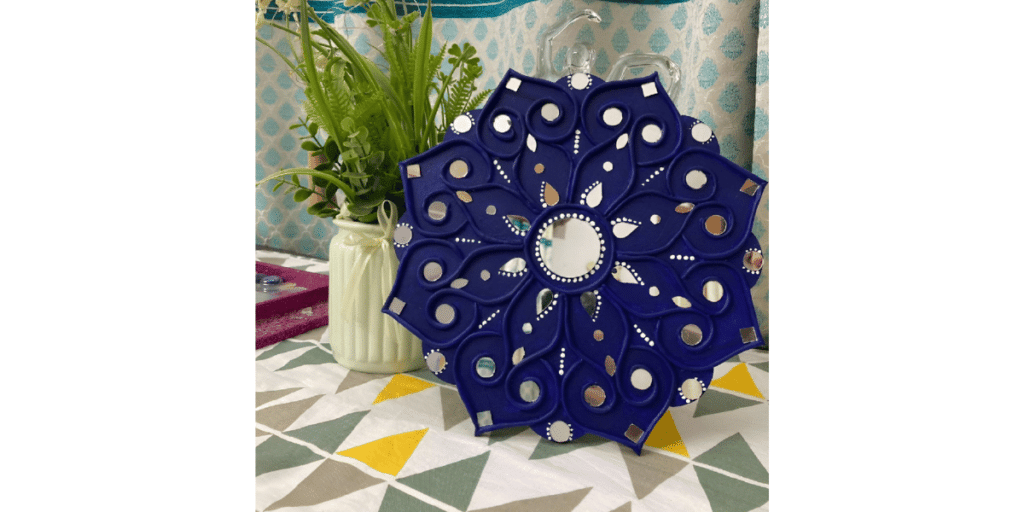
Don’t you think you can make lippan art paste at home? Think again! With just a few uncomplicated ingredients and a touch of patience, you can swiftly produce beautiful and one-of-a-kind artwork.
Let’s get creative and explore the possibilities of this traditional Indian craft.
Follow our guide to make your own lippan art paste from the comfort of your own home, and start crafting your masterpiece today!
Key Takeaways
- Prepare your work area by setting up a clean and spacious space covered with plastic sheets or newspapers to prevent mess.
- Mix clay powder or natural clay with water in a ratio of 3 parts clay to 1 part water to create a thick, paste-like consistency.
- Add natural adhesive (gum arabic or synthetic adhesive) to the clay-water mixture to prevent cracking as it dries.
- Test the consistency of the paste on the chosen surface and adjust the clay, water, or adhesive as needed before applying it.
Ingredients List
You’ll need clay powder or natural clay, water, and a natural adhesive such as gum arabic or a synthetic adhesive to make your lippan art paste. To ensure the paste adheres properly, the ratio of adhesive to clay can vary, so experiment with different variations to find the best combination for your project.
Alternatives to clay powder are also available, such as natural clay, which can give your artwork more texture and dimension. The drying process can take several days, so it’s important to be mindful of the humidity of your environment to prevent cracking.
Different types of clay and tools can be used to create intricate designs and patterns, so don’t be afraid to experiment with different techniques and materials. With some patience and creativity, you can make stunning lippan art pieces.
- Editor’s Choice
- Best Seller
- Amazon Choice
Preparing Your Work Area
Before starting to make your lippan art paste, prepare your work area by covering the surface with plastic sheets or newspapers. This helps create a clean workspace, as well as protecting against any mess. You can also use protective coverings for the floor.
Additionally, organize your tools and set up adequate lighting to make sure your project is seen clearly.
Lastly, choose the right surface for your project. A flat, smooth surface is ideal for lippan art paste, as it will help ensure your art is even and consistent.
With a little preparation, you’ll be ready to start creating your masterpiece.
Measuring the Clay
Next, measure the clay according to your project size, using a ratio of 3 parts clay to 1 part water. Be sure to think outside the box and explore clay alternatives like powdered clay or natural clay. Here are a few tips to help you get started:
- Log the amount of clay you use for each project.
- Know the different clay types to get the desired consistency.
- Estimate the drying time for the clay.
Innovators should use the right measurements and clay types to get the perfect paste for their lippan art project. Knowing the drying time is also important since it affects the texture and consistency of the paste. Consider experimenting with different mixtures to find the perfect balance of clay, water, and adhesive for each project. You can use this method to craft one-of-a-kind and customized lippan artworks.

Mixing Clay and Water
Now, mix the clay and water thoroughly, stirring continuously to achieve a thick, paste-like consistency. Use a ratio of 3 parts clay to 1 part water. Add natural adhesive like gum arabic or synthetic adhesive to the clay-water mixture. Create a simple test to determine the ideal clay consistency, and adjust the ingredients as needed. Try alternative adhesives for different results.
Make sure the paste is completely dry before displaying your art, as the drying process may take a few days.
With the right clay mixing techniques and ratio of water to clay, you can create lippan art paste with innovation and ease!
Adding Natural Adhesive
Carefully add natural adhesive, such as gum arabic or synthetic adhesive, to the clay-water mixture to make the lippan art paste.
Different natural adhesives provide different results, so experiment to find the adhesive that works best for your project. Consider alternative adhesives like flour paste or starch if gum arabic isn’t available.
The ratio of adhesive to clay can vary, but a common ratio is around 1 to 2 tablespoons of adhesive per cup of clay.
- Editor’s Choice
- Best Seller
- Amazon Choice
Allow your lippan art paste to dry for several days to ensure it adheres properly and has the right consistency.
If you experience any common issues, troubleshoot by adjusting the clay, water, or adhesive.
With the right adhesive, your lippan art paste will be ready to be proudly displayed!
Testing and Creating Your Art
Once you’ve mixed the clay, water, and adhesive, test a small amount of the paste on your chosen surface to ensure it adheres properly and has the right consistency, then start creating your art.
Try out various testing techniques to get the perfect consistency. Experiment with different colour variations to create a unique design.
Troubleshoot any common issues that arise. Consider alternative adhesives for different effects. And don’t forget to try creating textured effects with the paste!
With a little practice, you’ll be able to make beautiful lippan art at home.
Conclusion
By utilizing a handful of straightforward steps and basic ingredients, you can craft a stunning piece of art right from the comfort of your own home. It’s an excellent avenue for delving into your creative instincts and crafting something truly distinctive and meaningful.
The process of making lippan art paste is like the journey of life; with patience, perseverance, and determination, you can create something truly unique, beautiful, and meaningful.
So, grab your ingredients and get started on your lippan art paste adventure today!


